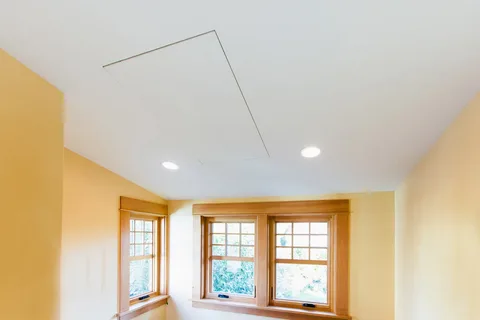
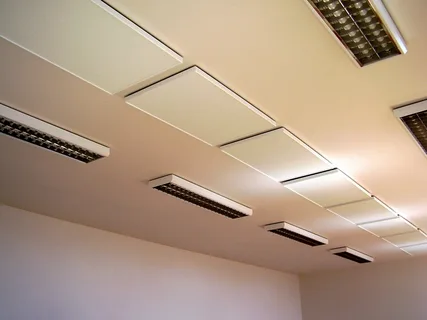
Heating your home efficiently and effectively is crucial, especially during those cold winter months. Traditional heating systems can sometimes fall short in delivering consistent and comfortable warmth, leading many to explore alternative solutions. One such innovative solution is ceiling mounted infrared heating panels, a game-changer in home heating technology. If you’re considering an upgrade to your home heating system or looking for a more efficient way to stay warm, installing ceiling mounted infrared heating panels could be the project for you. This DIY guide will walk you through everything you need to know about installing these advanced heating solutions in your home.
Understanding the Basics of Infrared Heating
Infrared heating operates on a principle distinct from conventional methods by directly emitting infrared rays that warm up objects and individuals in a room. This approach bypasses the traditional process of heating air, making it a more energy-efficient choice. The infrared rays are absorbed by surfaces, furniture, and bodies, which then release the heat, maintaining a comfortable environment that feels naturally warmer.
Unlike standard heaters that create uneven hot spots by heating the air, infrared panels ensure a uniform distribution of warmth. These panels are an effective solution for those seeking an alternative heating system that offers both efficiency and comfort. By focusing on direct heating, ceiling mounted infrared heating panels provide a method that not only enhances energy utilization but also promotes a healthier living space by not circulating dust or potential allergens.
Moreover, they offer silent operation and are maintenance-free, adding to the overall convenience and benefits of adopting this alternative heating system. Additionally, their sleek design adds a modern aesthetic to any room, making them a practical yet stylish choice. Now that we understand the advantages, let’s delve into how to install these panels in a simple step-by-step process.
Choosing the Right Radiant Ceiling Heat
Selecting the correct radiant ceiling heat is essential for ensuring your space is heated effectively without overusing energy. The key factors to consider include the area’s dimensions, the height of your ceiling, and the insulation’s effectiveness. These elements will help you determine the appropriate wattage needed to efficiently heat your space. Additionally, consider how the room is typically used; spaces with high traffic or that are used more frequently may require panels with higher output.
Infrared heating panels come in a variety of designs, some of which can serve as decorative elements on your ceiling. Whether you’re looking for a panel that blends seamlessly with your existing decor or one that stands out as a piece of art, there is a wide range of options to suit your aesthetic preferences. Keep in mind that the right panel not only contributes to the room’s comfort but also its overall look.
By taking these factors into account, you can choose a ceiling mounted infrared heating panel that meets both your heating needs and design desires, ensuring a comfortable and stylish space. Remember that selecting the right model is just the first step. Installation and proper maintenance are equally important to ensure your infrared heating panel works optimally and lasts longer.
Tools and Materials You’ll Need
To kickstart your project on the right foot, it’s imperative to have all your tools and materials ready before diving into the installation process of ceiling mounted infrared heating panels. Ensure you have the following items on hand: a reliable drill for creating pilot holes, a versatile screwdriver for securing brackets, a stud finder to locate the ceiling joists accurately, and a tape measure for precise placement.
You will also need a wire stripper for preparing electrical connections, electrical tape for ensuring safe wire joins, a sturdy ladder to reach your ceiling comfortably, and safety goggles to protect your eyes during the installation. The core components for the installation include the infrared heating panels themselves, the accompanying mounting brackets, and any hardware specified by the manufacturer for a secure installation.
Having these tools and materials prepared beforehand streamlines the installation process, making it smoother and more efficient. With these essentials at your disposal, you’re all set to begin the installation process. In the following sections, we’ll break down the steps you need to follow to successfully install your ceiling-mounted infrared heating panels.
Mounting the Ceiling Heating Panels to the Ceiling
Begin by identifying the ideal locations for your ceiling heating panels, prioritizing even distribution of warmth throughout the room. Utilize a stud finder to pinpoint the positions of the ceiling joists, as these will serve as the secure anchor points for your panels. Carefully mark the designated spots for the mounting brackets, ensuring accuracy for optimal support. Proceed to drill pilot holes at these marks, taking care to make them the right size for the screws that will affix the brackets to the ceiling.
Following the drilling, attach each mounting bracket firmly with screws, verifying their stability before proceeding. With the brackets in place, lift each panel up to the ceiling, aligning them with the previously installed brackets. Secure the panels onto the brackets as outlined in the manufacturer’s guide, making certain that each panel is firmly and evenly supported. This step requires patience and precision to ensure that the panels are mounted securely and at the proper angle for maximum efficiency.
Once installed, check the alignment and positioning of the panels one last time, as adjustments are easier to make now than after wiring and final installation. Remember, accurate installation of your infrared panels is integral to ensuring optimal heat distribution and power efficiency.
 Electrical Connections of Radiant Heat Ceiling Panels
For those confident in their electrical skills, this step is crucial for ensuring your radiant heat ceiling panels are safely integrated into your home’s electrical system. Begin by shutting off the power at your home’s main circuit breaker to prevent any electrical hazards. Carefully follow the manufacturer’s wiring diagram provided with your panels for guidance on making the correct connections.
Use wire strippers to prepare the ends of the wires for connection, and then secure each connection with wire nuts, applying electrical tape around each for extra safety. Make sure that the wires are neatly organized and placed in a manner that prevents any contact with the heating panels themselves, as improper placement could pose a risk. If there’s any uncertainty about this process or if you’re not fully comfortable handling electrical wiring, seeking the assistance of a professional electrician is highly advised. This not only ensures the safety of your installation but also the optimal performance of your ceiling mounted infrared heating panels.
Preparing for Installation
Before embarking on the installation of your ceiling mounted infrared heating panels, it’s crucial to create a conducive work environment. Start by decluttering the area where you’ll be working. This means moving furniture, rugs, and any other movable objects out of the way to provide clear access and reduce the risk of accidents or damage.
Ensuring the room is as empty as possible not only facilitates easier movement but also minimizes the likelihood of obstructions during the installation process. Secure a stable ladder that reaches your ceiling comfortably, positioning it on an even surface to prevent tipping or instability while you’re on it. Additionally, take this time to review the manufacturer’s installation instructions thoroughly.
Understanding each step, from the correct placement of panels to the specifics of electrical connections, is imperative before you begin. This preparation stage is all about setting the stage for a smooth, efficient installation process, enabling you to proceed with confidence and safety. Once your space is fully prepared, you can begin mapping out the exact locations where the infrared panels will be installed, considering both functionality and aesthetics. Don’t forget to have all your tools and installation materials at hand for a seamless operation.
Enjoying Efficient Heating with Electric Radiant Heat Ceiling Panels
With your electric radiant heat ceiling panels now successfully installed, you’re set to experience a transformative approach to heating your home. These panels deliver instant warmth upon activation, directly targeting the objects and individuals in the room without the need to warm up the air first. This direct method of heating not only ensures a more consistent and comfortable warmth but also contributes to the overall energy efficiency of your home.
Unlike traditional heating systems that often require extensive maintenance, your new infrared panels are designed for ease, demanding minimal upkeep. The aesthetic versatility of these panels also adds to the ambiance of any room, offering a sleek and modern heating solution that can effortlessly blend with or enhance your interior design. Enjoy the cozy warmth and improved energy savings that come with your ceiling mounted infrared heating panels, knowing that you’ve made a smart choice for both your comfort and your home’s energy consumption.
Maintenance Tips of Infrared Ceiling Panels
Maintaining your ceiling mounted infrared ceiling panels is straightforward and hassle-free, ensuring they continue to provide efficient heating for years. Regularly inspect the panels for any accumulation of dust or debris, which can be gently wiped away with a soft, dry cloth. Avoid using water or cleaning agents as they might damage the surface or electrical components. It’s also important to periodically check the security and condition of the mounting brackets and the electrical connections to ensure everything remains tight and intact.
This preventive maintenance not only guarantees the longevity and performance of your heating panels but also helps in preserving their aesthetic appeal. Should any issues arise with the performance of your panels, consulting the manufacturer’s guide or seeking professional advice is advisable to address the problem correctly and safely. By following these simple steps, you can enjoy the comfort and efficiency of your infrared heating panels without the need for frequent or complicated maintenance.
FAQs
- Certainly, installing ceiling mounted infrared heating panels is a task that many homeowners with basic do-it-yourself skills and some understanding of electrical systems can undertake. For those not entirely at ease with handling the wiring aspect, it’s advisable to enlist the services of a qualified electrician to ensure safety and correct installation.
- In terms of energy efficiency, these panels are among the most effective heating solutions available today. By directly warming objects and people, they minimize the energy wasted on heating empty air space, thereby offering significant savings on energy bills in comparison to conventional heating systems.
- Additionally, the safety of ceiling mounted infrared heating panels is well-established, provided they are installed and operated in accordance with the guidelines provided by the manufacturer. These panels are designed to operate at temperatures that are considerably lower than traditional heaters, significantly reducing the risk of burns upon contact. Moreover, their method of heating does not involve circulating air, thus not spreading dust or allergens, making them a healthier choice for your indoor environment.
Conclusion
In summary, the installation of ceiling mounted infrared heating panels presents an innovative and efficient way to heat your home. This DIY guide has walked you through the essential steps, from understanding the basics of infrared heating and selecting the right panels, to the actual installation and maintenance. With the right tools, a bit of preparation, and attention to detail, you can enhance your home’s warmth and comfort while also contributing to its energy efficiency. Remember, while this project is achievable for those with basic DIY skills, don’t hesitate to seek professional help for the electrical aspects if needed. By following the guidelines provided, you can look forward to a cozy and efficiently heated space that benefits from the cutting-edge technology of infrared heating.
| Related Business Listings |
| Contact Directory |
| Local Business Profiles |


